
I purchased all of my kegging equipment from Kegconnection, they have great prices, and excellent customer service. I was helped by a gentleman named Todd ,who I understand is the owner. Despite having received regulator guages that were damaged during shipping, Todd promptly replaced them without any questions asked. I even asked if he'd like me to return the damaged pair, and he said to just keep them. Sweet, no additional shipping costs to me!
Other hardware for the build was purchased at Lowe's, Ace Hardware and the 1-1/16" Craftsman combination wrench shown in the photo (I'll get to that later) was purchased at Sears, of course.
1 can of Great Stuff window and door spray foam (Lowe's)
1 tube of PL Polyurethane adhesive (Lowe's)
24" length of 1/2" copper pipe (Lowe's)
1-1/16" Combination wrench (Sears)
6 Stainless steel hose clamps (Ace Hardware)


I started my kegerator build this past Friday, and had a couple of hours each day to work on it through the weekend. I started with this mini-fridge. Frigidaire model #FRC445GM.

The first order of business was to remove the top, although it wasn't extremely difficult it was somewhat of a pain in the ass. I would suggest working from one of the rear corners to start. The top is attached with foam insulation, and some adhesive tape around the top's edge. This is what it looks like with the top off.


While removing the top, I managed to crack it right next to the door hinge. I used a small amount of epoxy on the inside of the crack to reinforce the damaged point while hiding it a the same time. It is purely cosmetic, and will not be noticed unless pointed out. So be careful!

The second order of business was to cut out the foam insulation and reveal the cooling lines.

I used a filet knife to make the initial cuts into the foam, and dug it out with a putty knife. A metal spatula, or scraper would work well for this also. It is imperative that care is taken not to puncture the coolant lines, or you will have a very expensive paper weight on your hands!


There is a plastic film between the cooling lines and the foam, the darker gray areas in this photo is where the plastic film pulled away from the metal and the lighter area is where the flash from the camera is reflecting off the plastic film..

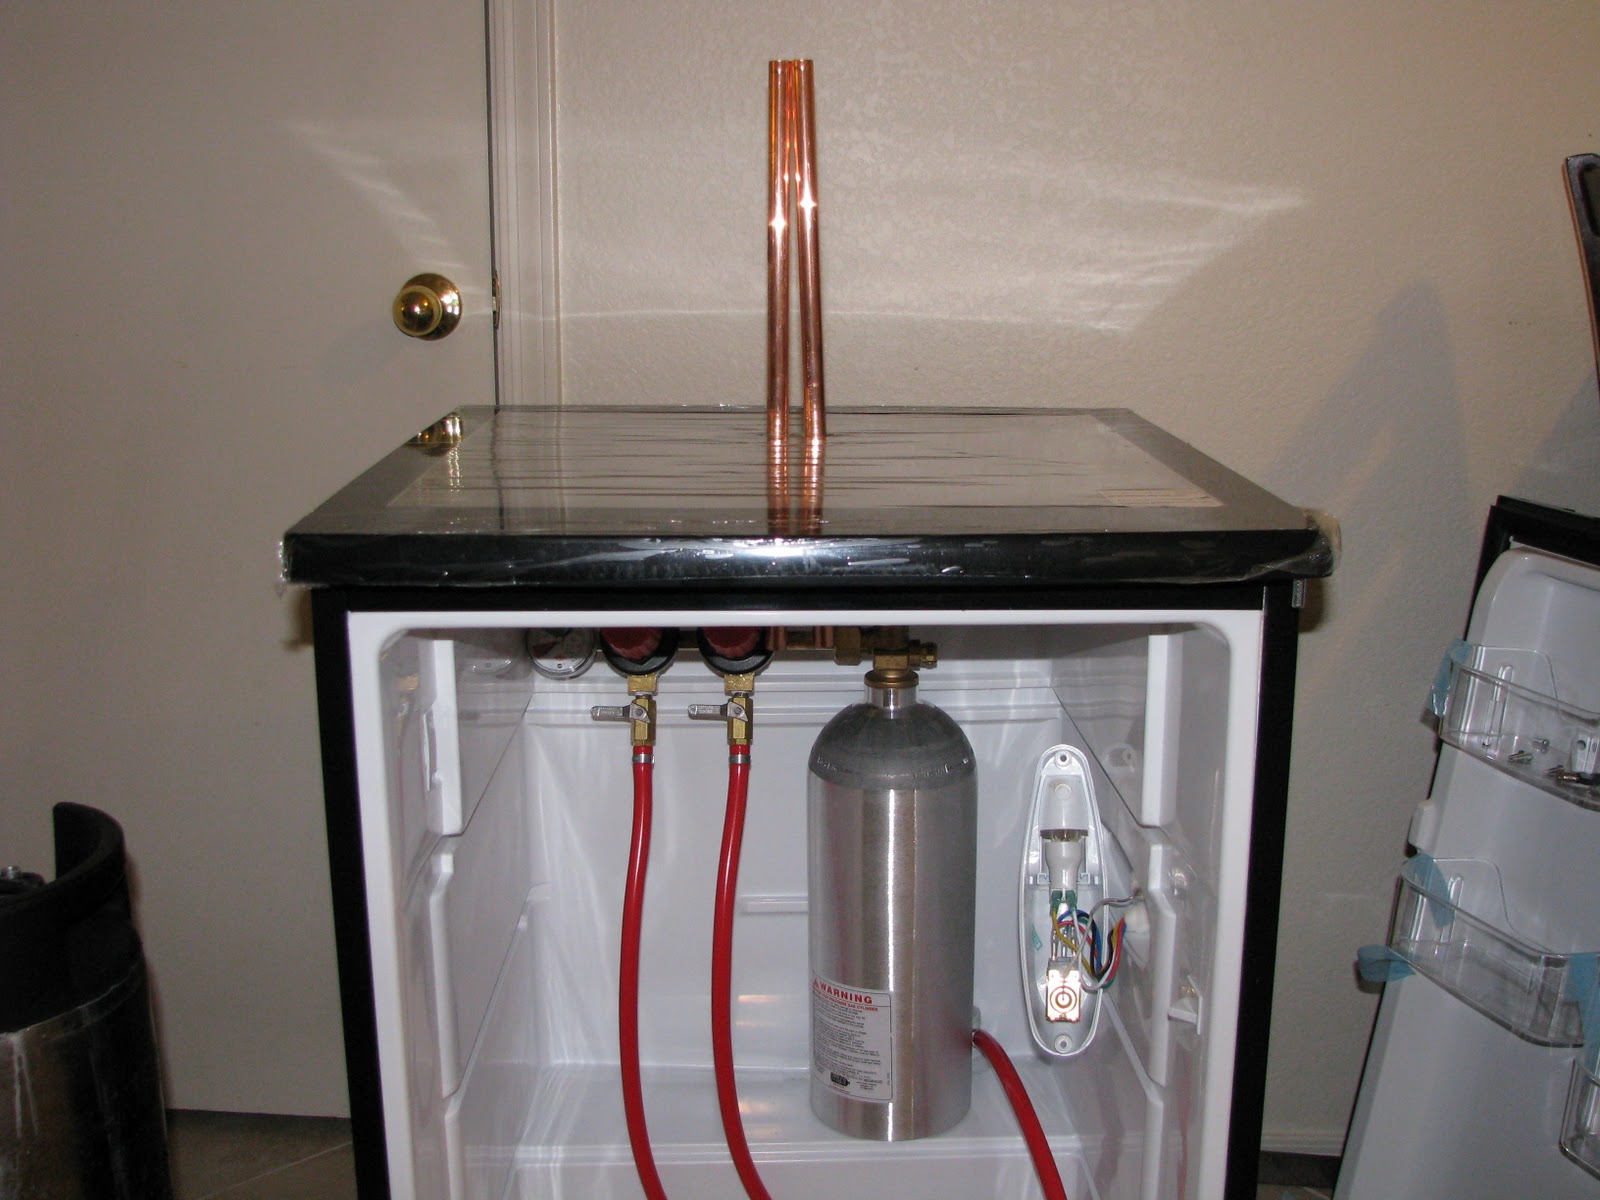
Next, I needed to drill the holes for my copper cooling tubes. I chose to use copper tubing to cool the beer lines simply because it saves space, and it is easier and less expensive than building a cooling box for the tower. Copper is one of the highest thermal (and electrical) conductive metals, and should keep my beer lines chilled enough to reduce foaming.
For this step, I drilled a 1/8" pilot hole, and used a step bit to make the hole exactly 11/16". The OD of my copper tubing was 11/16", and fit snugly into the holes.


The top needed to be modified to fit over the wood reinforcement. I took a utility knife, and removed the grid on the underside of the refigerator top. This was the most labor intensive part of this build.


After removing the grid, I sanded the area to smooth out anything that was missed with the utility knife. I used a medium grit all purpose sand paper, in an attempt to rough the surface so the adhesive would stick better.

I then dug out the foam to the same dimensions as the wood reinforcement. I cant remember the exact measurements, but I believe it was 16 1/2" x 13 3/4".

I removed only 1/2" of foam so the wood sits flush.


I needed to drill corresponding holes in the top and in the wood to line up with the fridge. I drilled a 1/8" pilot hole through both the wood and the top, then used a 3/4" hole saw and drilled the holes in the wood, and I used the step bit to make the holes in the top 11/16".

Everything lined up perfectly.

The angle of the camera makes it look off, but it was right on.

I dry fit the copper pipe to make sure I had the proper length to fit in the tower, I wanted the pipes to fit as far up onto the tower as possible. The copper pipes are 16 1/2" long, with 2 1/2" extending into the fridge.

My pipes converge at the top, which wasn't intentional, but it works out perfectly with how the shanks are positioned inside the draft tower.
The thermostat scews must be removed and the housing pushed back and out of the way for the kegs to fit.
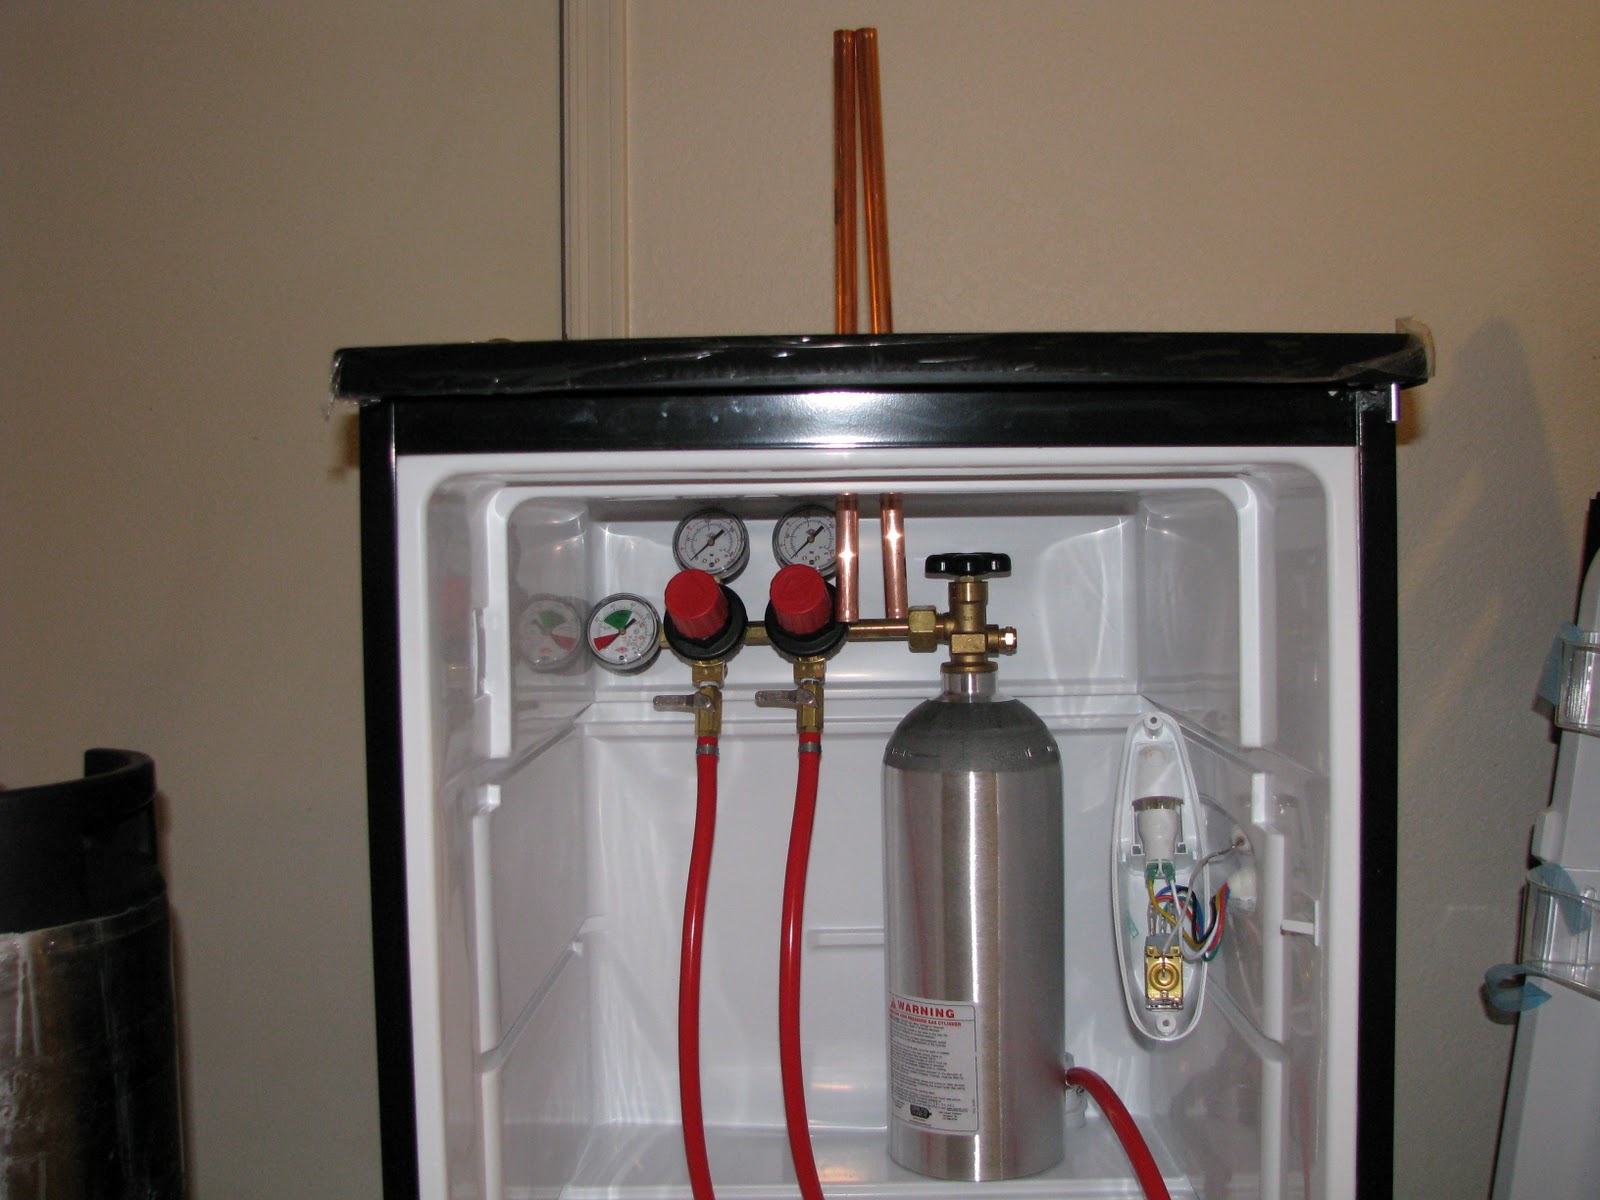
There was originally about 4" of pipe extending into the fridge, and while logic tells me that the more copper pipe exposed inside the refridgerator the cooler they will keep, however, they interefered too much with my regulator, so I shortened them to extend into the fridge 2 1/2".
I filled the recess where the foam was dug out with the Great Stuff spray foam, and also put some spray foam between the wood and the fridge's existing foam since it wasn't cut perfectly even. Then the top was glued to the wood using the PL polyurethane adhesive, and I placed 2 full corny kegs ontop while everything cured. (I needed to move quickly, and didn't have anyone to snap photos of the process for me.)
TIP:
(A piece of advice for anyone taking on this project would be to use a rubber band, or to tape the copper tubing together at the top and bottom to ensure the pipes won't slide down into the fridge after the foam is applied. I almost had a disaster juggling the top, wood and pipes all at once, and the spary foam will be on your hands for weeks if you get any on yourself, so use rubber gloves.)

I had to make my own shank nut wrench, basically a fitting wrench, but I could not find a 1-1/16" fitting wrench, and even if I had it would have probably been more expensive than this combo wrench. My dremel made quick work cutting this bad boy.

I wanted to extend my beer lines from the standard 5' length that my draft tower came with to 10' lengths so I could serve under higher pressures without excessive foaming. I now have the ability to easily remove my tower shanks when necessary. I'm certain beer lines should be replaced every few years if not just for good measure.

My tower did not include hose clamps. After switching out the hoses, I added stainless steel clamps to prevent leaking from occurring.

It's a snug fit with co2 tank/dual regulator, kegs and beer lines.

Looking purdy!


Finished.

Overall this was a fun project, I had the ability to work on this for a couple hours each day over the course of 3 days, so this can be done in one day if you dedicate the time to it. With the exception of the near catastrophe from the spray foam and my pipes sliding into the fridge, everything went very well.
I plan on adding a Love Temperature Controller w/ blue LED display to this very soon, simply because the OE thermostat is bulky and unattractive hanging there. Even thought the OE thermostat will rarely be seen the digital controller will have the ability to regulate the temperature better, and it will look sweet once installed!
I hope you enjoyed this post as much as I enjoyed working on this project, now I just need my beer to finish fermenting so I can pull my first pint off of this bad boy!
Please feel free to comment.
BGB.

This is a great write-up! Because of this I've found one of these on Craigslist and am in the middle of the conversion. Thanks!!
ReplyDeleteI should've commented on this long ago, but this writeup was fantastic. I followed it to a T, and it worked great, and looks fantastic.
ReplyDeleteSince it didn't have enough room for a 2nd tank, for beer gas AND CO2 tanks, I drilled out the condensate drip hole, and ran the 2nd air line through there. Works great, and there's nothing quite as good as fresh homebrew on tap!
Cheers!
Just found this post on homebrewtalk.com. I just so happened to have gone out and purchased this exact refrigerator and then when I found this post of yours decided I'd use it as a guideline.
ReplyDeleteHow is the copper tubing working for you? I was considering just doing one larger copper tube, is there a reason you went with two?
I also used Kegconnection for the kegging equipment...great prices!
How did you start getting the top of the refrigerator off? Just pulling and prying? Or did you use some kind of tool?
Great work on the fridge! looks awesome! on a side note, how'd you get the kegs looking so sharp? I've tryed cleaning mine up using Goof Off(which worked ok), but still has all the scuff marks and some residue left.
ReplyDeleteThis comment has been removed by the author.
ReplyDelete